How to Burn Bootloader onto a New Atmega328P
You purchased a new Atmega processor and wanted to use it on your Arduino board, but you can’t upload the program (script) you want to run on the board.
To do this, you first need to burn the Bootloader on your Atmega processor.
Bootloaders play a vital role in enabling the microcontroller to communicate with the Arduino IDE and facilitate the uploading of sketches.
Tools and Equipment Required for Burning Bootloader
Hardware Requirements
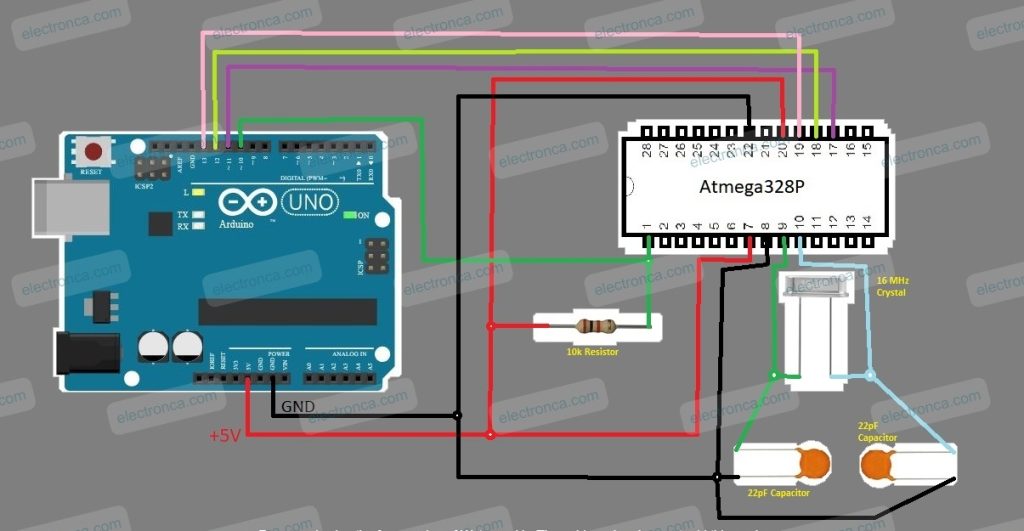
To burn a bootloader, you’ll need an Arduino board, a USB cable for connecting it to your computer and below listed components:
- 2x 22pF capacitors
- 1x 16MHz Crystal
- 1x 10k Ohm resistor
- Jumper wires
Software Requirements
You’ll need the Arduino IDE installed on your computer, along with the necessary bootloader file for the ATmega328.
Using Arduino as ISP(programmer)
- Open Arduino IDE
- Connect your Arduino Board to the computer
- Select your board (For example : Tools > Board > Arduino Uno)
- Select the port the board is connecting (Tools > Port)
- Open File > Examples > ArduinoISP

- Upload the ArduinoISP sketch to the Arduino board
- After uploading done, Select Tools > Programmer > Arduino as ISP
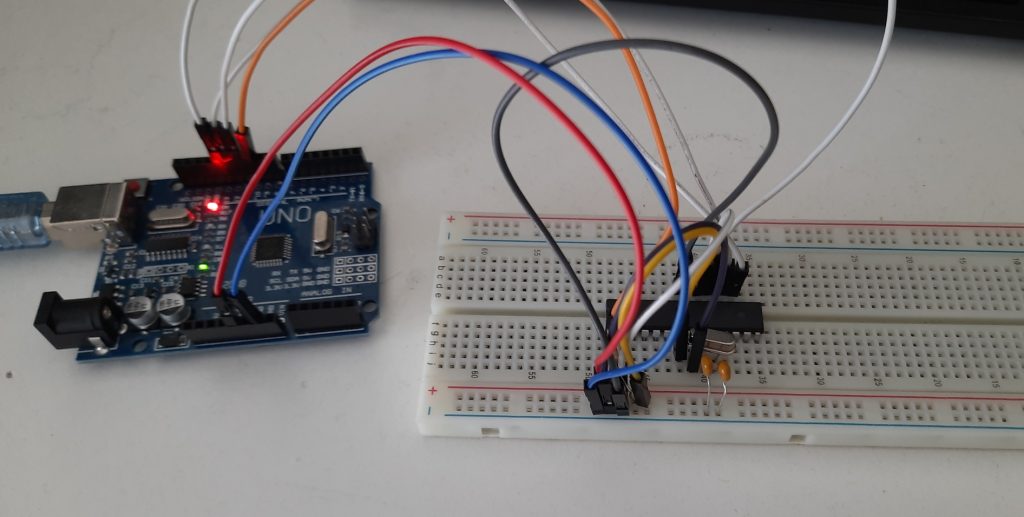
Now we are ready to make wire connections of the new processor chip (Atmega328P) to the Arduino board before burning the Bootloader.


Now you are ready to upload the programs you want onto your newly purchased Atmega processor via the Arduino IDE and use it in your projects or just replace it on your old Arduino board.